

We’re not here to hate on regular polish—it’s great, really. But gel nail polish can’t be beaten if you’re looking for something long-lasting. The color options are endless, the finish is clean and glossy, and gel manicures last for two full weeks (if not more). While the pros will do an A+ job, going to the salon for a professional-level gel manicure isn't always necessary. With an at-home gel nail kit, you'll be on your way to achieving your dream nails from your couch.
The best at-home gel nail kits come with everything you could possibly need to get a flawless DIY manicure. The best part? You’ll be saving a ton of money—and time—by doing your nails on your own. Not sure where to start your search? We tapped Juli Russell, DIY nail expert for Sally Beauty, on the must-haves for your at-home gel nail kit, plus she outlines exactly how to achieve salon-worthy gel nails at home. Here, we’re rounding up the best at-home gel manicure kits.
What to Look For in a Gel Nail Kit
Before you grab the first gel manicure kit you see, make sure it has a few essential items. “If it’s your first time doing gel nails at home, I’d recommend getting an all-in-one kit that includes the essentials: cleanser, base coat, top coat, and a couple of colors,” advises Russell. “This takes out the guesswork of what products you need to use and gives you an easy system to get started with.”
You'll also want to ensure your kit includes a UV or LED lamp, as gel nail polish will only harden under UV or LED light. Which lamp to get boils down to personal preference. LED lamps cure polish faster, but are typically more expensive, whereas UV lamps are generally cheaper, but take longer to cure polish. While all nail polishes work under a UV lamp, not all gel polishes are compatible with an LED lamp, so make sure you check the brand of polish you are using.
The Best At-Home Gel Manicure Kits
- Best Overall Kit: Modelones Gel Nail Polish Starter Kit
- Best Budget Kit: Beetles Gel Polish with Led Light Nail Lamp
- Best Splurgeworthy Kit: Gelish Pro Kit
- Best At-Home Kit: Sally Hansen Salon Gel Polish Starter Kit
- Best At-Home Kit: Le Mini Macaron Rouge And Moi Gel Nail Polish Kit
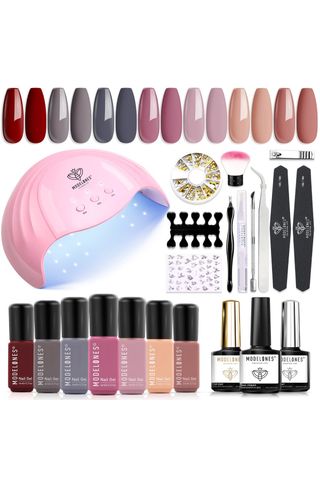
What looks like an awful lot of bells and whistles is actually a complete and effective collection of everything you need to groom, prepare, and polish your nails. Don't believe us? 19,000 Amazon reviews can give you a thorough endorsement. Take your pick from seven neutral colors, add your favorite nail stickers or rhinestones, then add your topcoat, all of which are included in this kit. This one even goes above and beyond with added nail primer, which is applied before your base coat for a longer-lasting mani. When we say this kit includes everything you need, we really mean everything.
Pros: Under $50; Includes seven nail colors; Includes nail stickers and gems; Polish applies smoothly.
Cons: Nail colors are a bit sheer.
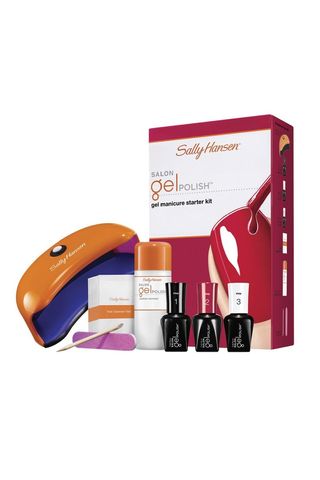
This effective little set contains all you need—read: no extra junk—for a solid, shiny manicure in about a minute and a half of curing time. Base coat, top coat, color, cleanser, nail file, cuticle stick, and an LED lamp are all included, plus you even get remover for when it's time for your next manicure. What's great is that when you tire of the neutral pink that this comes with, you can re-up with a simple trip to any ol' drugstore (no special orders required). This set only takes three steps for a salon-like manicure, so it's a great option for beginners.
Pros: Beginner-friendly; Dries quickly; Polish applies smoothly.
Cons: Only comes with one nail color.
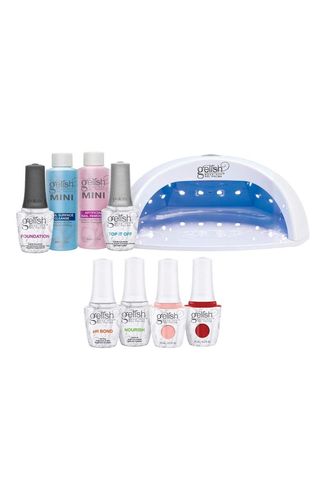
If you want to feel just like a pro from the comfort of your own home, this is the kit for you. Not only does the kit come fully stocked with everything you need for 40 (!) manicures—which is about two years of great nails, according to our calculations—but it's also equipped with one of the stronger LED lamps out there, meaning quicker wait-times and a sturdier finish than most. It also comes with full-size bottles of nail polish remover and cleanser, which are must-haves in your arsenal. This may be an investment, but at about $5 a manicure, you're still saving so much more than regular trips to the salon.
Pros: Dries quickly; Long-lasting; Includes high-power LED lamp; Includes two colors.
Cons: Expensive.
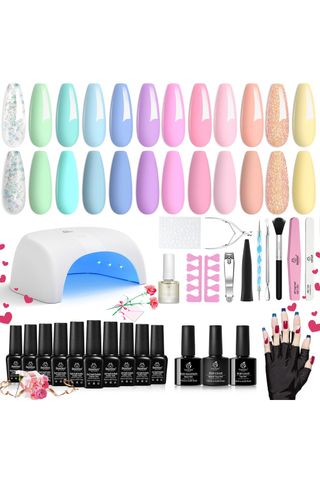
I'm obsessed with doing gel manicures at home (it's my personal form of self-care) and this is the kit I turn to every two weeks. It has everything you could need in a kit and much much more. Firstly, choose from 12 different colors, then pick between a glossy or matte top coat. You can even let your DIY skills shine with nail stickers and a dual-ended nail art pen. I also love how this kit includes gloves—you may not think about a manicure harming your skin, but those UV rays will do just as much harm as the sun. I've had this kit for over a year now and haven't had to replace any of the various tools or polishes so I can personally attest to the quality of this kit, as can 16,000 5-star Amazon reviews.
Pros: Under $50; Includes 12 nail polish colors; Includes two top coats; Leaves a strong, hard finish; Includes multiple nail prep tools; Applies smoothly; Easy to use.
Cons: Starts to chip after about nine days.
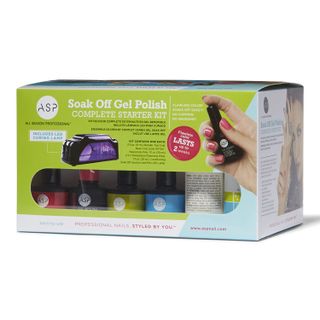
One of Russell's personal favorites, this kit promises two full weeks of chip-free wear. It comes with everything you could need to ensure a long-lasting mani: Dehydrator, cleansing wipes, base coat, top coat, color, and a UV lamp. While we admit this kit is on the pricier side, it's worth considering since it comes pro-recommend and the fact that a manicure with these products is sure to last you over 14(!!!) days.
Pros: Long-lasting; Leaves a strong, hard finish; Easy to use.
Cons: Expensive; Only comes with one nail color.
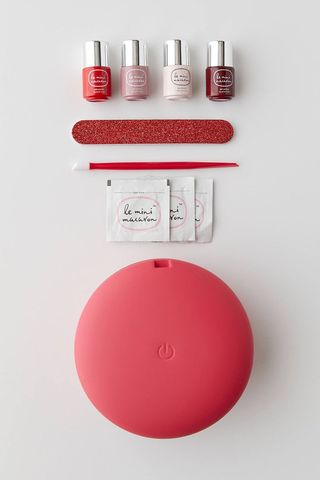
This kit is as adorable as it is effective: it's shaped like a macaroon, for God's sake. Simply clean the nails with acetone, and then use the LED lamp to cure the gel polish in between coats for up to two weeks of wear. Take comfort in knowing these cute polishes are vegan and free from nine toxic chemicals, plus they are a 3-in-1 formula that combines base coat, color, and top coat all in 1 bottle. This kit has a USB cord, too, so you can plug it into your laptop during a WFH lunch break...or just about anywhere. Pack it all up in the matching travel pouch for easy, quick manicures on the go.
Pros: Travel-friendly; Includes four vegan and nine-free nail polishes; Easy to use; LED lamp converts for pedicures.
Cons: Polish is a bit thick.
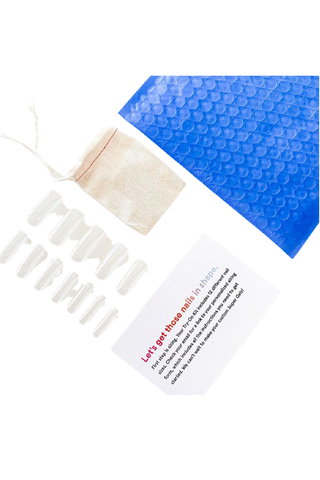
Are you the gal who was fine to spend upwards of two hours in the salon having an artist do an install on your nail beds? Color Camp are the gel nails for you. After doing an at-home try-on to make sure the pieces fit, you'll receive a completely custom lineup truly as good as an in-salon set. Extra points awarded for the wide range of ever-changing styles. Just like real gels, these press-on nails need to be removed with an acetone soak—not the intermittent picking method favored by many.
Pros: Under $50; Custom-fitted to you; Reusable; Available in 10 colors.
Cons: Prone to breaking off.
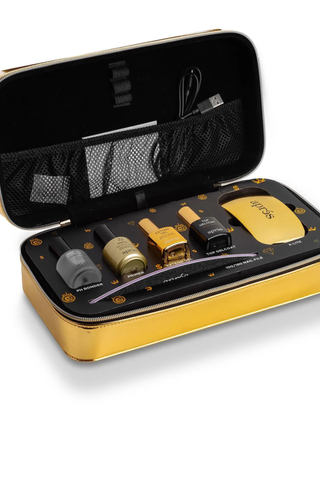
Chaun Legend, aka the man behind Kylie Jenner and Khloé Kardashian's nails, whipped up a special-edition gel mani kit with Apres. Unlike other gel polishes, this kit comes with pre-shaped coffin nails that get attached to your natural nail, so you can extend the length of your nails. Think of Apres gel as an acrylic manicure you get at the salon—you get the same hard, durable finish, but it's easier to remove with an acetone soak and your nails come out damage-free. Keep in mind that Apres gel requires a bit more prep for a longer-lasting finish, but once you get the process down, you'll be on your way to salon-worthy nails in no time.
Pros: Long-lasting; Available in different lengths; Leaves a strong, hard finish; Easy to remove;
Cons: Expensive; Requires more prep.
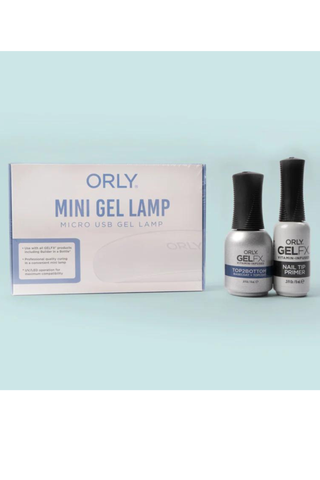
Whether you're embarking on a long vacation and want to toss a kit in your carry-on or are on the hunt for a gel set that won't take up counter space, this Orly option is the way to go. The mini lamp is compact—but it's still powerful. Because of the small size though, you'll want to let your nails sit under the lamp for a full minute. It also includes a USB charging port so you can bring the salon with you anywhere you go. Just grab your favorite gel polish and you're good to go.
Pros: Travel-friendly; Easy to use; Includes compact, high-power lamp.
Cons: Does not include color polish.
If you’re interested in more professional-grade at-home treatments, check out our favorite LED masks, keratin treatments, and dermaplaning tools.
How to Do an At-Home Gel Manicure
Let’s clear the air: An at-home gel manicure is easy. It’s beginner friendly! It’s foolproof! Maybe it doesn't seem like it, but a salon-worthy manicure at home only takes a few simple steps. Follow along below to achieve ultra-shiny, long-lasting nails right at home.
- “Nail prep is the most important for a lasting manicure, so take time to care for your nail beds, cuticles, and shape to your liking before you dive in,” says Russell.
- Once you’re satisfied with the look of your nails, buff ‘em out—gel adheres better to a textured surface.
- Then, you’re going to wipe your nails with rubbing alcohol. “This part is crucial for a long-lasting manicure,” says Russell. “Leaving oil or cuticles on your nail can cause your manicure to lift prematurely.”
- Now onto the fun stuff. Grab your polishes (you need a base coat, a color, and a top coat) and turn on your LED machine. “Do a thin layer of each and remember to ‘cap the free edge’ by dragging the leftover polish on the brush across your nail’s edge,” explains Russell.
- Between every coat, you’ll need to cure the polish for 30 to 60 seconds in your LED machine.
- To seal the deal, wipe the polish with an alcohol-soaked lint-free wipe.
- Finally, Russell says make sure to re-moisturize with lotion or cuticle oil as the rubbing alcohol can be drying on your nails and cuticles.
Meet the Expert

Stay In The Know
Marie Claire email subscribers get intel on fashion and beauty trends, hot-off-the-press celebrity news, and more. Sign up here.

Samantha Holender is the Beauty Editor at Marie Claire, where she reports on the best new launches, dives into the science behind skincare, and keeps up with the latest trends in the beauty space. She has previously written for Us Weekly, Popsugar, Makeup.com, Skincare.com, and Philadelphia Wedding. Follow her on Instagram @samholender.
- Brooke KnappenbergerAssociate Commerce Editor
-
 Halle Bailey Opens Up About Having "Severe" Postpartum Depression
"It's to the point where it's really bad."
By Meghan De Maria Published
-
 While In Character Filming ‘Never Been Kissed,’ Drew Barrymore Was Told to Tone It Down Because “You’re Just Looking Too Unattractive”
The studio told Barrymore she’d gone too far with the “Grossie” when it came to Josie Geller.
By Rachel Burchfield Published
-
 Does Katie Holmes Have a New Favorite Shoe Trend?
She swapped her usual sneakers for $150 Mary Janes.
By Halie LeSavage Published
-
 The 32 Best Hair Growth Shampoos of 2024, According to Experts
Rapunzel hair, coming right up.
By Gabrielle Ulubay Published
-
 The 20 Best Hair Masks for Damaged Hair, According to Experts and Editors
Healthy strands, here we come!
By Gabrielle Ulubay Last updated
-
 How Often You Should Wash Your Hair, According To Experts
Keep it fresh, my friends.
By Gabrielle Ulubay Published
-
 The 11 Best Magnetic Lashes of 2023
Go ahead and kiss your messy lash glue goodbye.
By Hana Hong Published
-
 Beauty Advent Calendars Make the Perfect Holiday Gift
The gift that keeps on giving.
By Julia Marzovilla Last updated
-
 The 18 Best Natural Hair Products in 2023
Remember: Your curls are your crown.
By Gabrielle Ulubay Published
-
 The 9 Best Hot Rollers for the Curls of Your Dreams
This is how we roll.
By Samantha Holender Published
-
 The 12 Best Cream Eyeshadows, According to Makeup Artists
The best part? They’re so easy to apply.
By Samantha Holender Published