From multiple interviews, we know that at least two out of three Kardashian sisters wear Joe Blasco foundation and that once, as a Christmas present, their father bought 14-year-old Kim makeup lessons at a Joe Blasco school. Ding ding! So that's where it all began. (FYI, Mr. Blasco totally remembers Kim and describes her as a pretty, precocious girl who was eager to learn.)
After some phone calls and a few Sphinx-y tests to prove we are true of heart and noble of intention, we were finally granted permission to not only speak with Joe Blasco himself but also to experience a one-on-one tutorial with him. (This is a BFD because here are some of the celebrities he's worked with in his 40-plus-year career in Hollywood: Marlene Dietrich, Lauren Bacall, and David Bowie, after whom he named a greenish-whitish shade of red neutralizer.)

So did he hiss and make the sign of the cross when he saw our bare faces? Did we gain any insight into the Kardashian Hive Mind? Answers: 1) He's the kindest, most patient gentleman we've ever had the pleasure of Skyping with, so no—he held it in. And 2) whatever real-feature-obliterating contouring they do now, they must have devised themselves. Because as you'll learn from the following steps, the Joe Blasco Method is rather anti-Kardash, with its thin, thin layers, perpetual blending, and emphasis on enhanced *natural* beauty. But don't take my word for it—see three hours of master maquillage distilled into five sections for yourself right here.
Foundation
Before applying foundation, Mr. Blasco had us prep by tapping our fingers in some emollient, almost lip-balm-like moisturizer then all over our faces to prevent the base from sticking to any dry patches and creating an uneven surface. Next, we wrapped tissues around our fingers and patted to remove the excess.
For authenticity, we stuck with Joe Blasco Ultrabase, which is old-school, nearly solid foundation that's highly pigmented. Because it's so dense, we were instructed to use a light hand, sponging most of it off on the fleshy part of the palm near the thumb before applying it with a rolling, tapping motion, like so:
Concealing
After you've pressed and blended your foundation in with your sponge, then fingers, move on to concealing. Again with your digits, pat concealer (told you that was the right way) on any red spots or dark spots, usually around the nose and under the eyes.
Now, this could *technically* follow under the next category, but since we used the same orangey, concealer-y-type product we used under the eyes to brighten, I'm including it here. This shows you the exact spots to place a lighter concealer or foundation:

Shading and highlight
Warning: This one has multiple parts, so buckle up.
Jawline
Take a brown cream with some gray in it (or cream bronzer) and using a foundation brush, blend with a bit of your actual foundation. Holding the brush horizontally, trace your jawline, lifting slightly as you near your chin.
Cheekbones
Starting from the hairline with the flat side of the brush, continue to sweep the cream or bronzer (that you've mixed with a bit of foundation) under and along the cheekbone, lightening the pressure until you lift off completely as you get close to the corners of your mouth.
Nose
Using the thin side of the brush, start from the heads of the eyebrows and follow each side of the nose. Then, holding the brush wide-side up, make three flicking motions at the tip of the nose to shorten it (visually). At this point, you can set everything by wrapping a powder puff around your index finger, rolling the surface on some pressed powder, then rubbing the sides of the puff against each other to distribute the product evenly. After that, go back to wrapped-around-the-index-finger position and pat the entire face.
Eyes
The first trick here is the "drop shadow," which is the (imaginary, for me) shadow your lashes cast on your bottom lid because they're so thick. Run a small, stiff brush dipped in some taupe eyeshadow vertically along the bottom lash line.
To create the illusion of width, take a fluffy brush dipped in the same taupe and, holding it vertically, start from the outer corner and sweep inward. (Make sure to decrease the pressure as you move in so you don't end up with a brown rainbow shape.)
Lips
With a lip brush, line the outside border first, then fill in.
And whatever you do, avoid pressing the lips together—they're not exactly the same, so you'll just have to go back and clean up. After your lipstick is neatly applied, pat tinted lip balm in the center of the bottom lip and on each point of the upper lip right under the Cupid's bow.
And...here are our before and afters. (You've stuck around this long.)


-
 Bella Hadid Confirms Capri Pants Are So Back
She's so convincing, I already bought a pair.
-
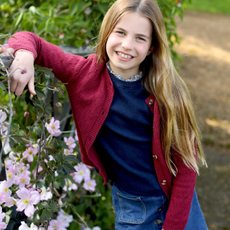 Princess Charlotte Turns 9—See the Sweet Photo Taken by Mom Kate
Wait, she's 9??? Then how old am I?????
-
 The 2024 Met Gala Is Almost Here—Here's How and When to Stream It Live
Armchair fashion critics, it's our time.


-
 The 11 Best Magnetic Lashes of 2023
Go ahead and kiss your messy lash glue goodbye.
-
 The 12 Best Cream Eyeshadows, According to Makeup Artists
The best part? They’re so easy to apply.
-
 The 9 Best Bronzers for Dark Skin Tones, According to Makeup Pros
Because Black and Brown girls like to look tan, too.
-
 Eyeshadow Palettes You’ll Actually Use
No shade left behind.
-
 50 Easy Halloween Makeup Ideas for 2024
From cute to scary, these looks only take minutes.
-
 The 11 Best Drugstore Bronzers Under $20, According to Makeup Artists and Editors
You'll look you've just returned from Ibiza.
-
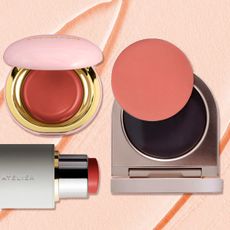 The 15 Best Cream Blushes for a Natural Flush
RMS, Rare Beauty, and Tower28 top our list.
-
 How to Tint Your Eyebrows at Home, According to Experts
“The primary challenge is getting the intensity and color right."


